| Tomb Raider levels |
The Lost Valley
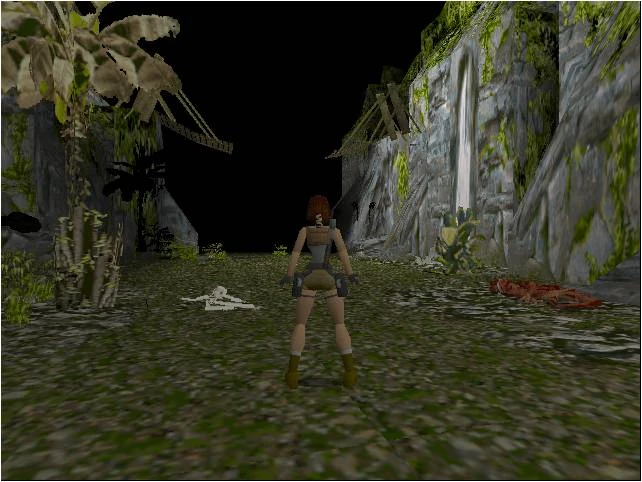
Lost Valley is the third level of Tomb Raider. In it, Lara continues her search for the Scion and she discovers a valley that time left behind.
The Lost Valley is a much larger area than its Peruvian predecessors. It has been sealed behind the City of Vilcabamba, and is significantly more barren and untouched by humans. It seems the Incas built a door-dam for the area's waterfall - presumably to make way to craft Qualopec's domain, where the Scion would evidently be buried with him. As Lara ventures around the area, she finds scattered remains of Inca crafting: an ancient cog-machine that operates the dam and some barren, probably communal rooms off from the waterfall's side.
However, natural rock formations take hold of the place, including a cave that serves as an entrance to the titular Lost Valley. Lara is greeted by greenery if she explores the cave, which leads her to the vast, lush valley. However, it is now evident what the Incas were protecting themselves from: the dinosaurs. How these creatures survived and bred through their extinction cannot be answered, but the valley is obviously outside, disconnected from any cave or village - and that would mean prey is accessible. At the very back of the valley, another Incan structure can be discovered. The valley is the final stepping stone to finding Qualopec's resting place.
Walkthrough[]
Hidden Shotgun[]
Instead of heading downstream at the start of the level, turn left as you emerge from the first tunnel and follow the cave wall around the rough stone pillar to the stream. Now you're going to head upstream, hopping from bank to bank. Be careful not to fall in the water. The current will wash Lara over the falls into the lake below. She won't take any damage, but you'll have to climb back up and start all over again.
(NOTE: If you're having trouble with these jumps, you might want to review the section on HOW TO SET UP JUMPS on my Strategy page. With these simple techniques you'll almost never miss a jump again.)
First take a running jump from the starting point to the far side. Walk a few steps upstream and then turn and take another running jump back to the other side. Walk up the slope to the top where it juts out above the stream. Take a standing jump to the ledge across the water. (For this jump, be sure to start on the left side of the ledge or press Action to lower Lara's arc as she jumps; otherwise, she'll hit the ceiling and fall into the water.) Turn left and take another standing jump to the ledge just upstream. Turn left again to face across the stream. Position Lara at the middle or right side of this ledge, walk to the edge, and then take a standing jump to grab the opposite side. Pull up and follow the twisting passageway around to a wooden bridge.
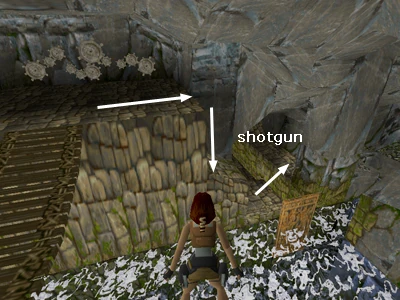
The machine on the other side of the bridge can't be activated yet. For now, to get the shotgun, cross the bridge and drop down onto the stone ledge below on the right (indicated with arrows in the screenshot below). Drop to the small ledge below and jump across the stream to the skeleton on the ledge. Among the bones, you'll find the SHOTGUN.
To get back to the start of the level, either go back the way you came, or jump into the stream on the other side of the gold gate and let the current carry Lara over the falls. Pick up the main walkthrough from the beginning.
(NOTE: If you want to, you can go after what would be secret #5 before going downstream. You'll find directions to it in the main walkthrough. You'll have another chance to get it when you return here at the end of the level.)
Copyright © 1997-2009 Stellalune (email stellalune@tombraiders.net). All TR1 screenshots were made using Glidos and Fraps. Feel free to copy, distribute and quote this walkthrough, but please include this credit line so people can send me their corrections, comments and suggestions. Also, if you'd like to offer this on your own web site, please read and follow the instructions here.
Details[]
Outfit[]
Weapons Found[]
Items[]
- Machine Cog (x3)
Allies Encountered[]
- None
Enemies Encountered[]
- Wolf (6)
- Velociraptor (5)
- T-Rex (Boss)
Locales Visited[]
- Caves
- Lost Valley
Secrets[]
- Magnum Ammo, Large Medipack, Uzi Ammo and Shotgun Ammo
- Shotgun Ammo
- Magnum Ammo and Shotgun Ammo
- Large Medipack
- Small Medipack and 2 sets of Shotgun Ammo